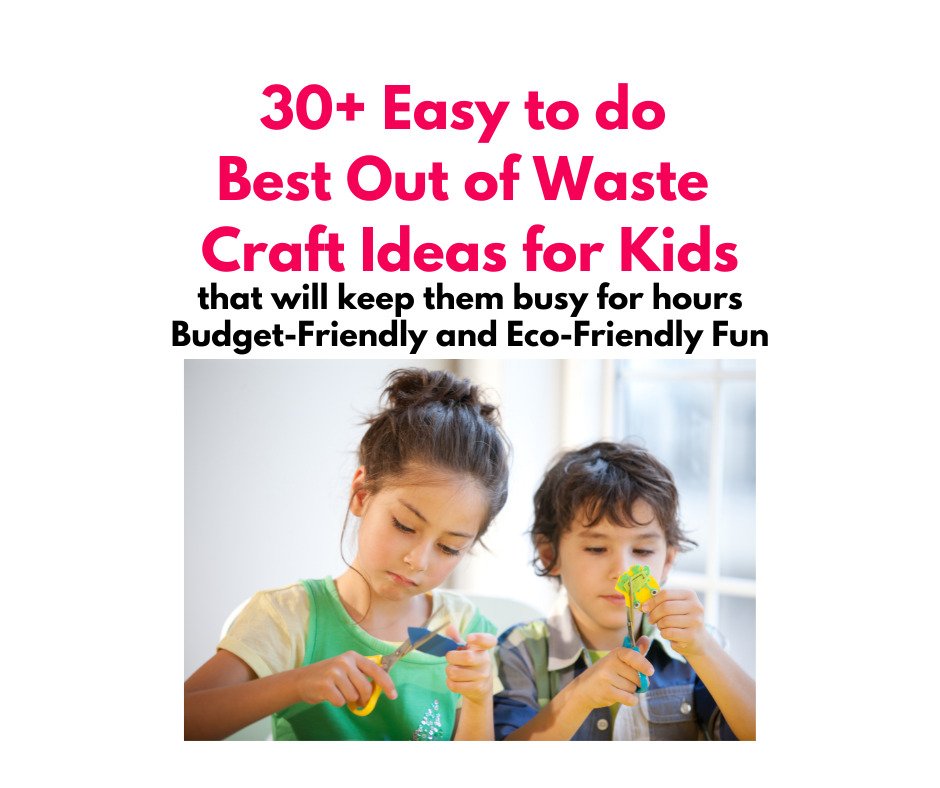
Looking for fun, sustainable, and budget-friendly craft ideas to keep your kids entertained? Look no further! Our list of 30+ Best Out of Waste Craft Ideas for Kids will inspire creativity, promote recycling, and provide hours of entertainment. From turning old t-shirts into tote bags to creating birdhouses out of milk cartons, these easy and exciting craft ideas are perfect for kids of all ages. Whether you’re a seasoned crafter or just starting out, these easy and budget-friendly ideas are perfect. Get ready to have fun while doing your part for the environment!
Are you tired of constantly hearing the sound of “Mom, I’m bored!” or “Dad, can we do something fun?”? Do you find it challenging to keep your kids occupied without breaking the bank? As a parent, we understand the struggle of finding sustainable and eco-friendly activities that can keep our little ones entertained for hours.
But what if we told you that there’s a simple solution that could tick all those boxes and more? The answer lies in the art of crafting with waste materials. Yes, you heard that right! With a little bit of creativity, you can turn everyday items into something beautiful and functional, all while keeping your kids engaged and entertained.
We understand that sometimes it can be daunting to come up with craft ideas on your own, especially when you’re not sure where to start. That’s why we’ve compiled a list of 30+ easy and exciting craft ideas that are perfect for kids of all ages. From making a birdhouse out of milk cartons to turning old t-shirts into stylish tote bags, these crafts will not only keep your children occupied, but they’ll also teach them the importance of reusing and recycling.
So, if you’re ready to embark on a fun and sustainable adventure with your little ones, then let’s begin!
We promise that with these best out of waste craft ideas, your children will be entertained for hours on end, and you’ll feel good about doing your part for the environment.
30+ Unconventional Best Out of Waste Craft Ideas for Kids: Budget-Friendly and Eco-Friendly Fun
With a little bit of imagination and some recycled materials, your kids can create unique and exciting projects that will keep them entertained for hours.
In this article, we will explore 30+ unconventional best out of waste craft ideas that are perfect for kids of all ages.
We will divide them into some basic categories.
Cardboard Creations
Our first category of best out of waste craft ideas for kids is cardboard creations. With just a few boxes and some imagination, your kids can create anything from a fort to a dollhouse to a maze. One of the best things about cardboard is that it is readily available and can be easily repurposed. Instead of throwing away those old boxes, encourage your kids to use them to create something new and exciting.
One great example of a cardboard creation is a fort. All you need is a large cardboard box, some scissors, and some markers or paint. Cut out windows and doors, decorate the outside, and let your kids’ imaginations run wild. They can use the fort as a playhouse, a hideout, or even a reading nook. The possibilities are endless!
Plastic Fantastic
Another great category of best out of waste craft ideas for kids is plastic fantastic. Plastic is a material that is often viewed as harmful to the environment, but it can be repurposed in creative ways that promote eco-friendliness. One great example of a plastic craft is a wind chime. All you need are some plastic bottles, scissors, string, and beads. Cut the bottles into different sizes and shapes, string them together with the beads, and hang them outside. Your kids will love hearing the chimes tinkle in the breeze, and you will love that you are keeping plastic out of the landfill.
Popsicle Stick Pals
Our third category of best out of waste craft ideas for kids is popsicle stick pals. Popsicle sticks are a versatile material that can be used to create a wide variety of crafts, from puppets to picture frames to bookmarks. One of the best things about popsicle stick crafts is that they are great for enhancing fine motor skills and fostering imagination and storytelling abilities.
One great example of a popsicle stick craft is a puppet. All you need are some popsicle sticks, some markers or paint, and some glue. Draw or paint a face on the popsicle stick, add some yarn for hair, and decorate with buttons, sequins, or other small embellishments. Your kids will love putting on puppet shows with their new creations!
T-Shirt Transformations
Our fourth category of best out of waste craft ideas for kids is t-shirt transformations. Instead of throwing away old t-shirts, why not turn them into something new and exciting? T-shirts can be transformed into tote bags, headbands, or even scrunchies.
One great example of a t-shirt transformation is a tote bag. All you need is an old t-shirt, some scissors, and some fabric glue. Cut off the sleeves and neckline of the shirt, turn it inside out, and glue the bottom and sides together. Add some fabric paint or markers to decorate, and you have a stylish and eco-friendly tote bag that your kids will love carrying around.
Newspaper Nook
Our final category of best out of waste craft ideas for kids is newspaper nook. Newspapers are often viewed as outdated and irrelevant, but they can be repurposed in creative ways that promote sustainability.
So, let us get started.
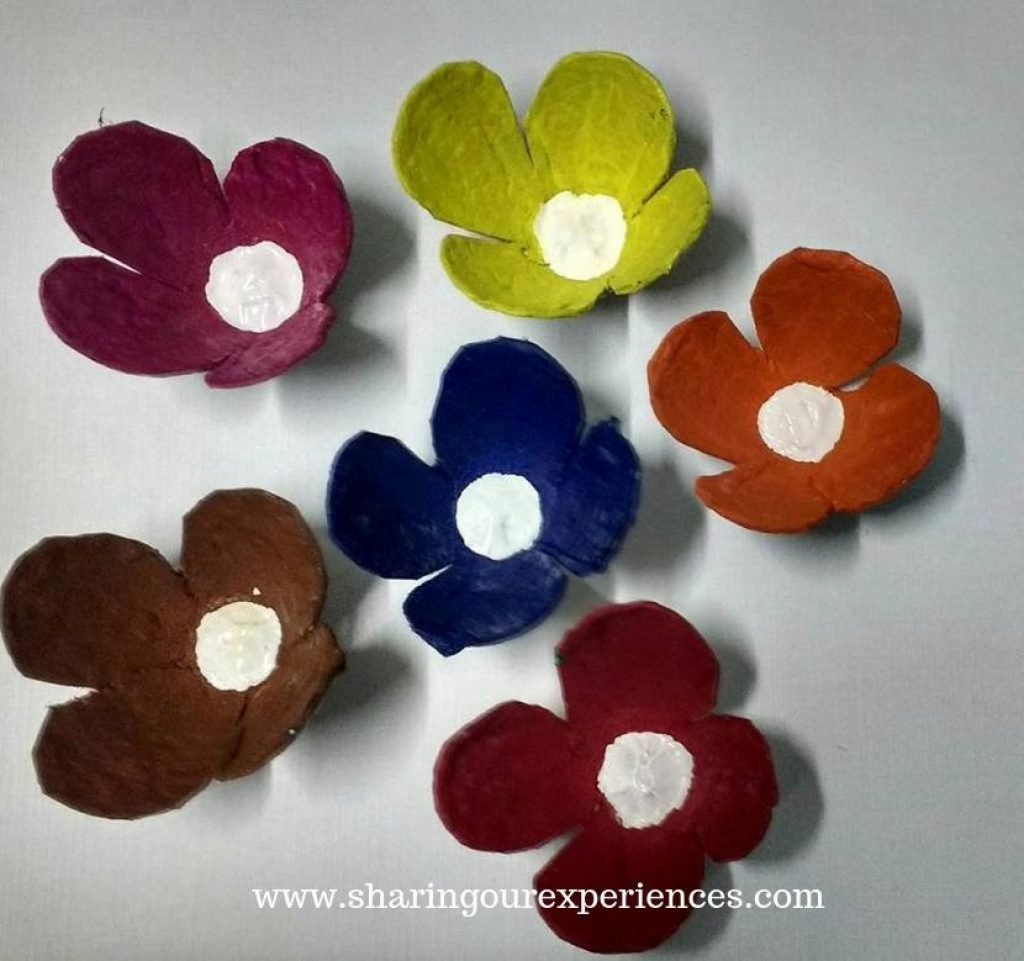
Egg Carton Flower
Create a beautiful bouquet of flowers from an old egg carton with this easy craft activity. It’s perfect for kids who love to paint and get creative with their hands.
Things You Need
- Egg carton
- Acrylic paint
- Green pipe cleaners
- Scissors
- Glue
- Paintbrushes
Procedure
- Cut out the individual egg cups from the egg carton, making sure they are even in size.
- Using acrylic paint, paint each egg cup in bright and vibrant colors. You can paint each cup differently or use a color theme.
- Leave the egg cups to dry completely.
- Cut a small slit in the bottom of each egg cup.
- Take a green pipe cleaner and fold it in half. Thread the pipe cleaner through the slit in the egg cup, with the fold at the bottom.
- Twist the pipe cleaner around itself to secure the egg cup in place.
- Repeat the process with the remaining egg cups, spacing them out evenly along the pipe cleaner.
- Once all the egg cups are attached, shape the pipe cleaner into a stem and add a leaf or two at the bottom.
- Use glue to secure the leaves in place.
- Your beautiful egg carton flower is now ready to display!
This craft activity is not only fun and engaging but also a great way to repurpose an old egg carton. It will also teach children about recycling and the importance of reusing materials.
Also Read – How to make Egg Carton flowers
Toilet Roll Bird Feeder
Things You Need:
- Toilet roll
- Peanut butter
- Birdseed
- String
Procedure:
- Cut two small slits on opposite sides of the toilet roll.
- Spread a layer of peanut butter on the toilet roll.
- Roll the toilet roll in birdseed.
- Thread a string through the slits and tie it in a knot.
- Hang it outside for the birds to enjoy!
Upcycled Tin Can Wind Chimes
Things You Need:
- Tin cans
- Paint
- Paintbrush
- Beads
- String
- Scissors
- Nail
- Hammer
Procedure:
- Paint the tin cans in your desired colors and let them dry.
- Using a nail and hammer, poke a small hole near the bottom of each can.
- String beads onto a length of string, then tie the ends of the string to the top of each can.
- Tie the cans together at the top to create a wind chime.
- Hang it outside and enjoy the soothing sound!
CD Candle Holders
Turn your old CDs into a beautiful and unique candle holder with this easy craft.
Things You Need:
- Old CDs
- Mod Podge
- Paintbrush
- Tissue paper
- Scissors
- Tea lights
Procedure:
- Cut the tissue paper into small pieces of various shapes and sizes.
- Apply Mod Podge to the back of the tissue paper using a paintbrush.
- Stick the tissue paper pieces on the CD in any design or pattern of your choice.
- Let the CD dry for a few hours.
- Once the CD is dry, apply another layer of Mod Podge on top of the tissue paper to seal it.
- Let the CD dry completely.
- Once the CD is completely dry, place a tea light candle in the middle of the CD.
- Light the candle and enjoy the beautiful glow of your CD candle holder.
You can make multiple CD candle holders and arrange them together to create a beautiful centerpiece for your next dinner party or special event.
Also Read – Craft ideas for T Light Holders With Old CD’s
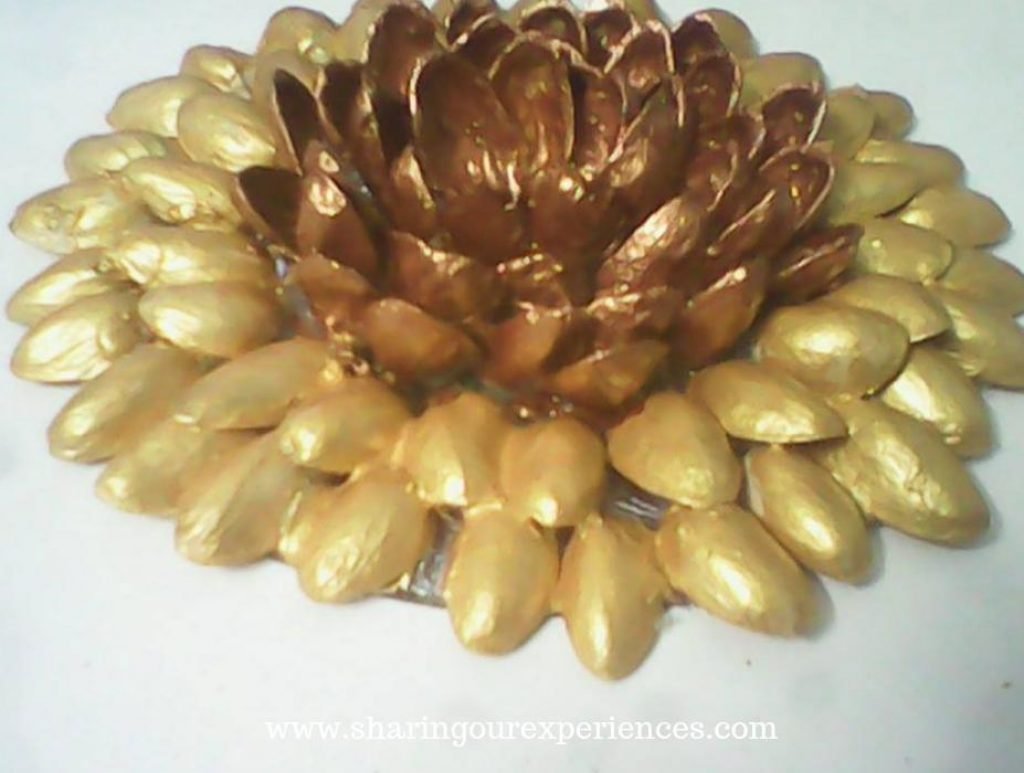
DIY Candle Stand from Marbles and an Old CD
DIY Candle Holder from Pistachios Shells and an old CD
DIY Magazine Coasters
Things You Need:
- Old magazines
- Scissors
- Glue
- Mod Podge
- Paintbrush
- Corkboard
- X-acto knife
Procedure:
- Cut the magazines into strips about 1 inch wide.
- Glue the strips together to create a larger piece.
- Use Mod Podge to glue the magazine piece to the corkboard.
- Once dry, trim the edges with an X-acto knife.
- Enjoy your unique and colorful coasters!
Plastic Bottle Piggy Bank
Things You Need:
- Plastic bottle
- Paint
- Paintbrush
- Scissors
- Construction paper
- Glue
- Marker
Procedure:
- Cut a small slot in the plastic bottle for coins.
- Paint the bottle in your desired color and let it dry.
- Cut out ears and a snout from construction paper and glue them onto the bottle.
- Draw on eyes with a marker.
- Start saving your money in your new piggy bank!
Mason Jar Terrarium
Things You Need:
- Mason jar
- Rocks
- Soil
- Small plants
- Decorations (optional)
Procedure:
- Put a layer of rocks at the bottom of the mason jar for drainage.
- Add a layer of soil on top of the rocks.
- Plant your small plants in the soil.
- Add any decorations such as small figurines or rocks.
- Place your terrarium in a sunny spot and watch your plants grow!
DIY Cardboard Tube Binoculars
Create a pair of binoculars with cardboard tubes for imaginative play and exploration.
Things You Need:
- 2 cardboard tubes (such as from paper towel rolls)
- Paint
- String or yarn
- Hole punch
- Scissors
Procedure:
- Paint the cardboard tubes in your desired colors.
- Allow the paint to dry completely.
- Punch a hole on each side of the tubes, towards the front.
- Cut a piece of string or yarn and tie it through each hole.
- Adjust the length of the string or yarn to fit around your child’s neck.
- Your cardboard tube binoculars are now ready for playtime.
Recycled Paper Flowers
This is a great craft that uses old newspapers, magazines or scrap paper to make beautiful flowers that can be used as decoration.
Things You Need:
- Old newspapers, magazines, or scrap paper
- Scissors
- Pipe cleaners
- Glue
Procedure:
- Cut out several squares of paper in different sizes.
- Stack them up and fold them like a fan.
- Twist a pipe cleaner around the center of the folded paper to make the stem.
- Carefully separate each layer of paper and gently pull them apart, making sure not to tear them.
- Fluff up the paper layers until you have a beautiful flower shape.
Also Read:
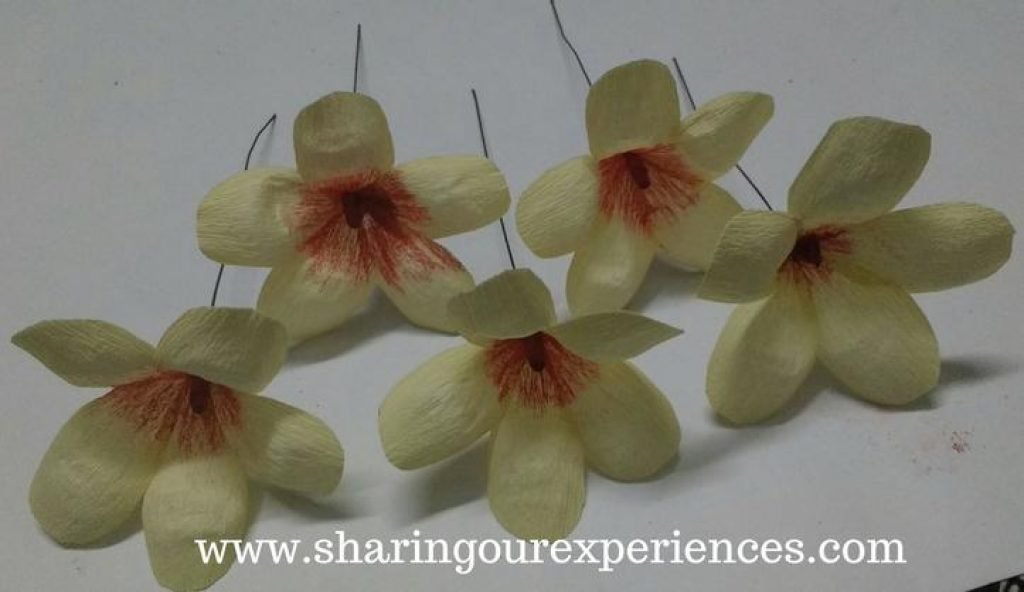
How to make easy crepe paper flowers
How to make Frangipani Crepe Paper Flowers
How to make Pink And White Crepe Paper Flowers
How to make Crepe Paper Daisies
How to make Crepe Paper Rose buds
Green and Purple Folded Glittery Foam Sheet Flowers
How to make Pink Glittery Foam Sheet Flowers | Free Crafts Tutorial
Recycled CD Wind Chimes
- This is a fun way to repurpose old CDs and create a beautiful wind chime that will add some music to your backyard.
Things You Need:
- Old CDs
- Scissors
- String or fishing line
- Beads
- Small bells
Step by Step Procedure
- Cut the CDs into various shapes using scissors.
- Thread the string or fishing line through each CD piece, adding beads and small bells as you go along.
- Tie each strand to a larger ring or hoop to hang your wind chime.
- Hang your wind chime outside and let the breeze create beautiful music.
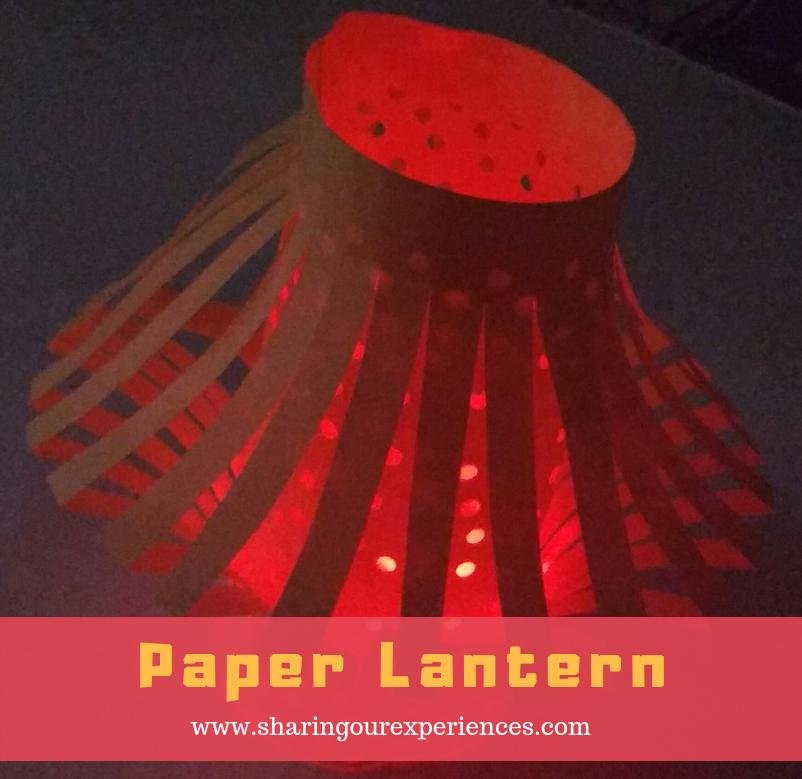
Recycled Jar Lanterns
Turn old glass jars into stunning lanterns that can be used to add some ambiance to your room or patio.
Things You Need:
- Old glass jars
- Tissue paper
- Mod Podge or glue
- Brush
- Tea light candles
Step by Step Procedure:
- Cut pieces of tissue paper into small squares or shapes.
- Brush a layer of Mod Podge or glue onto the outside of the glass jar.
- Carefully place the tissue paper on the jar, smoothing out any wrinkles or bubbles.
- Continue layering tissue paper until the entire jar is covered.
- Let it dry completely.
- Place a tea light candle inside the jar to create a beautiful lantern.
Cardboard Castle
- This is a fun and creative way to turn cardboard boxes into a magical castle.
Things You Need:
- Large cardboard boxes
- Scissors
- Paint
- Paintbrushes
- Markers
- Tape
Step by Step Procedure:
- Cut out the shapes of the castle walls, towers, and other parts from cardboard boxes.
- Paint the pieces in your desired colors and let them dry.
- Assemble the castle pieces using tape to hold them together.
- Use markers to add details and decorations to your castle.
- Once finished, your kids will have their very own castle to play in.
Plastic Bottle Planters
Transforming plastic bottles into planters is a wonderful way to teach kids about sustainability, recycling and upcycling. By making use of plastic bottles that would have otherwise ended up in a landfill, children can create cute and eco-friendly planters to adorn their rooms or outdoor spaces.
Things You Need
- Empty plastic bottles (various sizes)
- Scissors
- Soil
- Seeds or seedlings
- Paint, markers or stickers
- Twine or string (optional)
Procedure
- Rinse and dry the plastic bottles, then use the scissors to cut off the top of the bottle, leaving a sturdy base.
- If desired, use paint, markers or stickers to decorate the outside of the bottle. You can create fun designs, patterns or even add a face to the bottle to make it look like a character.
- Fill the bottle with soil, leaving enough room at the top for your seeds or seedlings.
- Plant your seeds or seedlings according to their specific needs.
- Water your plants and place the bottle in a sunny spot.
- If you want to hang your planters, cut two small holes on opposite sides of the bottle and thread twine or string through the holes, tying a knot at each end to create a hanger.
Milk Carton Bird House
Looking for a fun and engaging activity that will also help you attract birds to your balcony? Why not try making a birdhouse out of an old milk carton? Your kids will love watching the birds come and go, and it’s a great way to teach them about nature and sustainability.
Things You’ll Need:
- An empty milk or juice carton
- White spray paint
- White adhesive, such as Fevicol
- A hot glue gun
- One plastic spoon
- Coloured tissue paper
- A cutter or knife
- Sponge brushes
- A soft book cover big enough to make a roof
- Wool
Procedure:
- Start by spray painting the milk or juice carton and leave it to dry.
- Dilute the white glue with water and put a thin layer of it on the cartons and the roof made of the book cover.
- Before the glue dries up, use the coloured tissue paper randomly on the cartons for a colourful effect. You can even overlap one tissue over another.
- Make a hole in the top of the carton using a cutter and another on the side of the carton to make the door.
- Just below the door, cut a small ‘X’ shape and insert a plastic spoon in it. This is where the bird seeds can be put.
- Now fix the roof on top of the carton using the hot glue gun.
- Make two tiny slits on the roof, about 2 inches apart from each other. Put the wool through this to hang the pretty birdhouse!
Your kids will have a blast decorating the carton with coloured tissue paper and watching the birds come and go from their new home.
Bottle Cap Magnets
With a few bottle caps, your kids can make some cute magnets that they can display on their fridge or locker.
Things You Need: Bottle caps, small magnets, glue, paint, markers, stickers
Procedure:
- Clean and dry the bottle caps
- Paint or decorate the bottle caps using paint, markers, or stickers
- Glue the magnets to the back of the bottle caps
- Let the glue dry and your magnets are ready to use!
CD Spinners
If you have some old CDs lying around, your kids can turn them into fun spinners that they can play with.
Things You Need: Old CDs, markers, glue, toothpicks
Procedure:
- Decorate the CD using markers or paint
- Cut a small circle out of paper or cardboard that is slightly smaller than the CD and glue it to the center of the CD
- Insert a toothpick through the center of the small circle and glue it in place
- Spin the CD around by twirling the toothpick between your fingers.
Toilet Roll Crafts
Toilet rolls can be used for a variety of craft projects that your kids will love.
Things You Need: Toilet rolls, paint, markers, stickers, glue, scissors
Procedure:
- Paint or decorate the toilet rolls using paint, markers, or stickers
- Cut the toilet rolls into different shapes to create animals, flowers, or other objects
- Glue the shapes together to create your final craft.
Paper Plate Crafts
Paper plates can be used for a variety of crafts that your kids will enjoy creating.
Things You Need: Paper plates, paint, markers, stickers, glue, scissors, construction paper
Procedure:
- Paint or decorate the paper plates using paint, markers, or stickers
- Cut the paper plates into different shapes to create animals, flowers, or other objects
- Glue the shapes together to create your final craft.
Egg Carton Caterpillars
Egg cartons can be used to create cute caterpillars that your kids will love.
Things You Need: Egg carton, paint, markers, pipe cleaners, scissors, glue
Procedure:
- Cut out one section of the egg carton
- Paint or decorate the egg carton section using paint or markers
- Cut pipe cleaners into small pieces to make the cater
Bubble Wrap Painting
Bubble wrap isn’t just for protecting fragile items during shipping. It can also be used for a fun painting activity that kids will love.
Things You Need:
- Bubble wrap
- Paint
- Paper
- Scissors
Procedure:
- Cut the bubble wrap into small squares or rectangles.
- Apply paint to the bubbly side of the wrap using a sponge brush.
- Place the painted bubble wrap onto the paper and press down lightly.
- Repeat with different colors and patterns to create a unique painting.
Paper Plate Tambourine
Make your own musical instrument with just a few simple supplies.
Things You Need:
- 2 paper plates
- Stapler
- Dry beans or rice
- Paint, markers or stickers
- Paintbrush (optional)
Procedure:
- Decorate the backside of the paper plates with paint, markers, or stickers.
- Once dry, pour a small handful of dry beans or rice onto one of the plates.
- Place the other plate on top and staple around the edges, leaving a small opening.
- Pour in more beans or rice, and then staple the opening shut.
- Shake the tambourine and enjoy the sound.
Also Read – DIY Christmas Angel with Paper Plate
Super Easy DIY Paper Plate Christmas Wreath for Kids
Christmas tree paper plate craft for Kids – Easy to set up for busy moms
DIY Christmas Santa With Paper craft
CD Mosaic
Turn old CDs into a stunning mosaic with this craft activity.
Things You Need:
- Old CDs
- Scissors
- Glue
- Construction paper or cardstock
Procedure:
- Cut the CDs into small, irregular pieces using scissors.
- Glue the pieces onto the construction paper or cardstock to create a mosaic design.
- Allow the glue to dry completely before displaying.
Popsicle Stick Picture Frame
Create a fun picture frame with just a few popsicle sticks and some decorations.
Things You Need:
- Popsicle sticks
- Glue
- Decorations (such as stickers, beads, or sequins)
- Photo
Procedure:
- Glue the popsicle sticks together to create a square or rectangular shape.
- Decorate the frame with stickers, beads, sequins or other decorations.
- Glue the photo onto the back of the frame and allow it to dry completely.
- Display your masterpiece!
Popsicle stick wall hangings
If you have a pile of popsicle sticks lying around, this is the perfect craft to put them to good use. You can create a lovely, rustic-looking hanging that can be used to decorate your home or your child’s room.
Things You Need
Popsicle sticks Acrylic paint Paint brushes Twine or ribbon Hot glue gun Scissors
Procedure
- Start by painting the popsicle sticks with acrylic paint. You can use any colors that you like, but pastel shades work particularly well for this craft.
- Once the paint has dried, arrange the popsicle sticks in the shape of a ladder. You can use as many sticks as you like, depending on the size of the hanging you want to make.
- Use the hot glue gun to glue the sticks together where they meet. Make sure that the sticks are lined up neatly so that the ladder looks straight.
- Cut a length of twine or ribbon that is long enough to hang your ladder. Tie a knot in each end of the twine, and then glue each knot to the top of the ladder with the hot glue gun.
- To add some extra decoration to your hanging, you can glue small flowers or beads to the sticks. Alternatively, you could write a message or a quote on the sticks with a permanent marker.
- Once you’re happy with your hanging, you can hang it up on a hook or a nail. It looks particularly lovely hanging on a plain white wall.
This popsicle stick hanging is a simple yet effective way to add a touch of rustic charm to any room in your home.

Also Read – Very Easy Wall Hanging with Popsicle Sticks | Frugal Home decor crafts
Watermelon themed Handmade wall hanging with Ice cream sticks
How to make a beautiful homemade wall hanging by Ice cream stick painting
Red Roses Wall Hanging Craft | Valentines day craft and handmade gift
Paper Bag Puppet
Transform a simple paper bag into a fun puppet with this easy craft.
Things You Need:
- Paper bag
- Construction paper
- Scissors
- Glue
- Markers or crayons
Procedure:
- Cut out features such as eyes, nose, and mouth from construction paper.
- Glue the features onto the bottom half of the paper bag.
- Draw on additional details with markers or crayons, such as hair or clothing.
- Slip your hand inside the bag to bring your puppet to life.
Also Read – How to make a Paper Gift bag at home
Rock Painting
Rock painting is a fantastic and engaging activity that you can do with your kids. It’s an excellent way to unleash your creative side and create some truly unique and beautiful artworks. This activity is not only fun, but it’s also therapeutic and can help you relax and de-stress.
Things You Need:
Rocks of various sizes Acrylic paint in different colours Paintbrushes Paint markers Waterproof sealer
Procedure:
- Clean the rocks thoroughly and let them dry completely.
- Once the rocks are dry, use acrylic paint to paint the base colour. Let the paint dry before adding any designs or patterns.
- Use paint markers to draw patterns or designs on the rocks. You can let your imagination run wild and create anything you want.
- Once you’re done painting, let the rocks dry completely.
- Apply a waterproof sealer to protect the artwork from weather and wear.
- You can use these painted rocks to decorate your garden or give them away as gifts.
Rock painting is a great way to spend time with your kids while unleashing your creativity. It’s an activity that can be enjoyed by all ages, and the results are always impressive. So, get your rocks and paintbrushes ready and start creating some beautiful artworks!
Button Flowers
Looking for a craft that’s easy and fun for both adults and kids? Then look no further than these charming button flowers! All you need are some colorful buttons and a few other basic materials to create a delightful display of whimsical blooms that are sure to brighten up any room.
Things You Need:
- Colored buttons of various sizes
- Floral wire
- Green pipe cleaners
- Glue gun
- Wire cutters
- Scissors
Procedure:
- Select a large button for the flower center, and several smaller buttons for the petals.
- Cut a piece of floral wire to the desired length for the stem, and twist a green pipe cleaner around the top to create a sturdy base for the flower.
- Using the glue gun, attach the large button to the top of the pipe cleaner base.
- Glue the smaller buttons around the center button to create the flower petals. You can layer the buttons on top of each other for a more three-dimensional look.
- Once the glue has dried, use the wire cutters to trim the wire stem to the desired length.
- To finish, twist the pipe cleaner around the wire stem to create a leaf or two.
Tips:
- Play around with different button colors and sizes to create a variety of flowers.
- These button flowers can be used to create a beautiful bouquet, or they can be attached to gift packages, wreaths, or other decorative items.
- Use wire cutters with caution and keep them out of the reach of children.
With these easy steps, you can create a stunning array of button flowers that are perfect for adding a touch of charm and whimsy to your home décor or for giving as a heartfelt gift.
Also Read – White Champa Flower Foam Craft for Kids – Easy step by step tutorial
Super Easy Foam Flowers | Must try with kids
DIY SATIN RIBBON HIBISCUS FLOWERS BUNCH
Cardboard Tube Rockets
Cardboard tube rockets are a fun and easy craft for kids of all ages. Not only is it an enjoyable activity, but it also provides an opportunity to teach kids about space exploration and the science behind rockets.
Things You Need:
- Cardboard tube
- Paints
- Paintbrushes
- Scissors
- Colored paper
- Glue
Procedure:
- Start by painting the cardboard tube with your chosen colors. Allow the paint to dry completely.
- Cut out triangles from colored paper and glue them to the top of the tube to create the rocket’s fins.
- Cut out a circle from the same colored paper and glue it to the bottom of the tube to create the rocket’s engine.
- Use white paper to cut out small circles and glue them to the top of the rocket for windows.
- Allow the glue to dry completely before playing with your new cardboard tube rocket.
Salt Dough Magnets:
Salt dough magnets are a great way to make unique and personalized magnets for your fridge. They are easy to make and can be customized with any design or shape.
Things You Need:
- 1 cup flour
- 1/2 cup salt
- 1/2 cup water
- Acrylic paints
- Paintbrushes
- Magnets
- Hot glue gun
Procedure:
- Preheat your oven to 250°F.
- Mix together the flour, salt, and water in a bowl until it forms a dough.
- Knead the dough for 5-10 minutes until it is smooth and pliable.
- Roll out the dough to about 1/4 inch thickness and cut out shapes using cookie cutters or a knife.
- Place the shapes on a baking sheet and bake for 2-3 hours or until fully hardened.
- Allow the salt dough shapes to cool completely before painting them with acrylic paints.
- Once the paint has dried, use a hot glue gun to attach a magnet to the back of the salt dough shape.
- Allow the glue to dry completely before using your new salt dough magnets.
Also Read – Easy Door/wall hangings with homemade clay | DIY home decorationa #DIY #Craft #Handmade #Homedecor
Easy candle holders with Clay | Handmade Diwali Home decor ideas #Crafts #Diwali #DIY
Pine Cone Bird Feeders
Pine cone bird feeders are a simple and enjoyable craft for kids that also doubles as a way to feed the local bird population. They are easy to make and can provide hours of entertainment for kids as they watch the birds come to feast.
Things You Need:
- Pine cones
- Peanut butter
- Bird seed
- String or ribbon
Procedure:
- Tie a piece of string or ribbon around the top of the pine cone, leaving enough length to hang the feeder.
- Spread a thick layer of peanut butter over the entire pine cone, making sure to get it into all the crevices.
- Roll the pine cone in bird seed until it is completely coated.
- Hang the pine cone bird feeder outside and wait for the birds to come and enjoy their feast.
Rainbow Salt Jars
This activity is a fun and easy way to add some color to your child’s playtime. With just a few simple ingredients, your child can create a beautiful and colorful jar that will mesmerize them for hours.
Things You Need
- Small jars with lids
- Salt
- Food coloring
- Parchment paper
- Tray
Procedure
- Pour salt into a jar until it’s about 1/4 full.
- Add a few drops of food coloring into the jar.
- Use a spoon to mix the salt and food coloring together until the salt is completely coated in color.
- Repeat with other colors and jars.
- Leave the jars open on a tray lined with parchment paper to dry. Make sure to spread the salt out in a thin layer to help it dry faster.
- Once the salt is completely dry, add more colors if desired.
- Close the lid of the jar and shake to create a beautiful rainbow effect.
Yarn Pom Poms
Yarn pom poms are a simple and versatile craft that your child will enjoy making. They can be used for a variety of purposes, including home decor, gift wrapping, and even as a toy for your child to play with.
Things You Need
- Yarn
- Scissors
- Fork
Procedure
- Hold a fork with the tines facing down and start wrapping the yarn around the fork.
- Wrap the yarn around the fork approximately 40 times for a small pom pom and 100 times for a larger pom pom.
- Cut a separate piece of yarn and tie it around the middle of the wrapped yarn. Make sure to tie it tight.
- Slide the yarn off the fork and cut through the loops on both sides.
- Trim the pom pom to your desired size and fluff it up.
Also Read – Caterpillar Craft for preschool using pompom, pipe cleaner and Popsicle sticks
Leaf Rubbing Art
Leaf rubbing art is a simple and fun way for your child to create beautiful artwork using leaves found outside. This activity is a great way to teach your child about nature and the different types of leaves they can find.
Things You Need
- Paper
- Crayons or pastels
- Leaves
- Tape
Procedure
- Collect leaves of different shapes and sizes.
- Place a leaf on a flat surface with the veins facing up.
- Tape a piece of paper over the leaf.
- Use a crayon or pastel to rub over the paper where the leaf is underneath.
- As you rub, the shape of the leaf will begin to appear on the paper.
- Try different colors and leaves to create a unique and colorful piece of art.
Also Read – Fish Making Through Leaf Etching
Paper Plate Jellyfish
Things You Need:
- Paper plates
- Scissors
- Paint or markers
- Yarn or ribbon
- Hole puncher
- Googly eyes
Procedure:
- Cut the paper plate into a wavy shape to resemble the jellyfish’s tentacles.
- Paint or color the plate as desired.
- Punch holes along the top of the plate.
- Thread yarn or ribbon through the holes and tie a knot at the top.
- Glue googly eyes onto the top of the plate.
Milk Carton Firefly Lanterns
Things You Need:
- Clean, empty milk cartons
- Yellow tissue paper
- Black construction paper
- Pipe cleaners
- Glue
- Scissors
- Battery-powered tea lights
Procedure:
- Cut the top off the milk carton and discard the cap.
- Cover the outside of the carton with yellow tissue paper and glue it in place.
- Cut out wings and eyes from black construction paper and glue them onto the carton.
- Cut pipe cleaners in half and bend them into antenna shapes, gluing them onto the carton.
- Place a battery-powered tea light inside the carton and turn it on.
Paper Roll Monsters
Things You Need:
- Empty paper rolls
- Paint or markers
- Construction paper
- Googly eyes
- Glue
- Scissors
Procedure:
- Paint or color the paper rolls in bright colors.
- Cut out arms, legs, and teeth from construction paper and glue them onto the rolls.
- Glue googly eyes onto the top of the rolls.
Optional: add decorations such as pom poms or pipe cleaners.
Sock Puppets
Things You Need
- Socks
- Glue
- Felt pieces
- Scissors
- Marker pens
- Buttons
- Yarn
Procedure
- Put the sock on your hand, and determine where the eyes, nose, and mouth will be.
- Take off the sock and use the marker pen to draw the eyes, nose, and mouth on the sock.
- Cut out felt pieces to use as the eyes and nose. Glue them to the sock using glue.
- Add buttons for the eyes.
- Cut the yarn and glue it to the puppet’s head for hair.
Also Read – No Sew Easter BUNNY from socks | Easy Handmade gifts
Newspaper Seed Pots
Things You Need
- Newspaper
- Empty toilet paper rolls
- Soil
- Seeds
- Scissors
- Water
Procedure
- Cut a sheet of newspaper in half.
- Wrap the newspaper around the empty toilet paper roll.
- Tuck the excess paper at the bottom into the roll, forming the base.
- Fill the newspaper seed pot with soil.
- Add a few seeds into the soil.
- Water the soil and place it in a warm area.
T-Shirt Headband
Things You Need
- Old T-Shirt
- Scissors
Procedure
- Cut off the bottom of an old T-shirt.
- Cut a strip from the bottom hem of the shirt, about 2 inches wide.
- Stretch the strip by pulling it on both sides until it rolls up.
- Wrap the strip around your head, tying it at the back.
Newspaper Wall Art
Things You Need
- Newspaper
- Scissors
- Glue
- Cardboard
- Paint (optional)
Procedure
- Cut out strips of newspaper.
- Apply glue to one side of the cardboard.
- Layer the newspaper strips on top of the cardboard, pressing firmly to adhere.
- Continue adding layers until the entire cardboard is covered.
- If desired, paint over the newspaper to add color.
- Allow the artwork to dry before hanging it on the wall.
Also Read – Top 40 Indoor games for kids to Burn Energy and Beat Boredom
Inspiration for Crafty Parents
You may be feeling overwhelmed by the thought of entertaining your kids at home all day, every day. It’s tough to come up with new ideas to keep them busy and happy, especially during these challenging times. But don’t worry, you’re not alone. We all feel this way sometimes, and that’s okay.
It’s essential to acknowledge and validate your feelings as a parent. It’s okay to feel overwhelmed or frustrated, but it’s also crucial to remember that you’re doing your best. In times like these, it’s easy to forget the positive impact you’re having on your children’s lives.
By trying out some of these easy and fun crafts with your kids, you’re creating memories that will last a lifetime. You’re also teaching them new skills and helping them develop their creativity and imagination. You’re showing them that even in challenging times, you can still have fun and create beautiful things.
So, keep up the great work, parents! Take a deep breath, relax, and enjoy some quality time with your children. Who knows, you might even discover a new passion for crafting yourself! With these easy and enjoyable craft ideas, the possibilities are endless. Now, let’s get creating!