
Looking for fun simple science experiments and activities for preschoolers? You would love this list of easy science activities that you can easily do at home. We have done most of these experiments at home so I am sure you can try these kid-friendly experiments
Science is fascinating and nothing less than magic for kids. We have put together in this post some really cool science experiments that you can try with your children. We have tried to put together easy science experiments that can be tried with the things easily available at home.
Let these Science experiments bring to them the magic they seek everywhere!
Best Science Experiments for 3 years to 5 years kids (Fun Science and STEM activities for preschoolers)
Science has always been a scary and no tread zone for me since childhood. As a student I always used to run away from it. I do not want my son to feel the same way about science and so I keep doing some fun experiments, STEM experiments to make it much more fun and interesting for him, something that will excite him and not make him run away.
Listing down some of our favourite experiments which you could also try with your little ones. For these kids, it doesn’t matter what the reason behind it is, why is it happening? All theycare about is that it’s magical and it’s a moment of wow. Here I’ll explain the reasons behind all experiments so that you know what you’re doing and also if you have older kids, you might as well tell them.

Science Experiments with Colors- Easy Rainbow Experiments
So we’ve done a couple of rainbow experiments and I will take you through all of them here.
If you love rainbows, you won’t want to miss these exciting ways to learn with rainbows. They are the perfect way to introduce scientific concepts to little ones, because who doesn’t love rainbows.
Kids can learn a lot with the rainbow theme. Rainbow in itself is a powerful illustration of reflection, refraction and dispersion of light.
- Walking Rainbow experiment
- Tissue paper/ kitchen roll Rainbow
- Rainbow with skittles
- Rainbow in a bottle/glass
- Rainbow on a CD
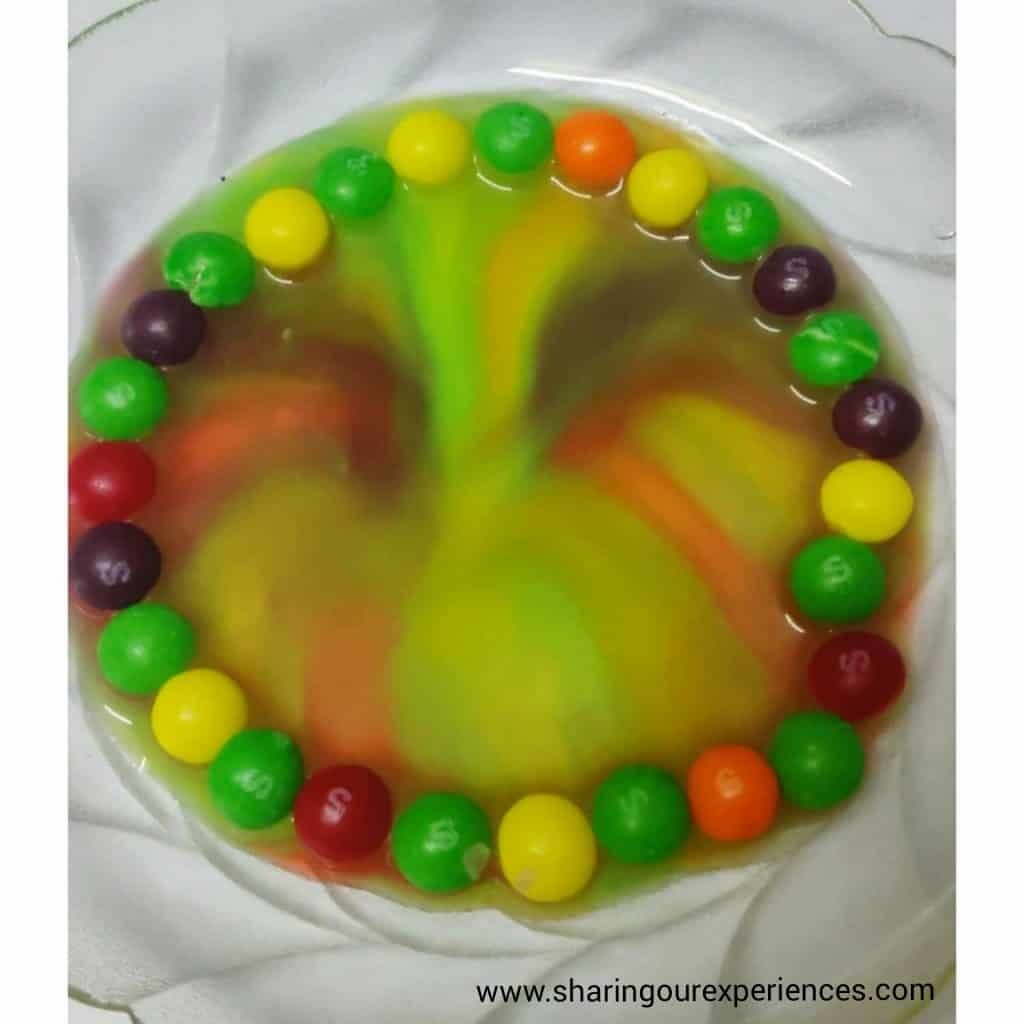
Rainbow with Skittles Experiment (Easy STEM activity involving food coloring and water
This is definitely a magic or wow moment for the little ones. No extensive setup required and the most loved activity or experiment so far.

Things you need for Rainbow skittles experiment
- 1. A packet of Skittles
- 2. Luke warm water
- 3. A transparent or white plate to arrange the skittles.
Arrange the Skittles in a circle around the edge of the plate. Pour lukewarm water. Be careful not to submerge the Skittles completely. It’s so soothing to watch the rainbow colours unfold so beautifully. The magic factor and the way a rainbow appears is amazingly satisfying to watch. The colors move to the center and create a whirl of color. We had tried this experiment with a pack of gems too but it’s failed, in the sense that the outcome wasn’t as beautiful as this. you could try this same with M&Ms too.
Learnings – What is the science behind Skittle’s experiment?
Why do Skittles make a rainbow in water? – Skittles are coated in food coloring and sugar. when you pour warm water over them, the colored coating dissolves spreading through the water. The color and sugar dissolve into the water and then diffuse through the water.
Rainbow tissue paper experiment (Easy Science experiment with Colored water)
Another simple fun experiment to do with kids which will undoubtedly impress them. You will love seeing the rainbow come together in this simple science experiment! You can even do different patterns and colors too.
✅ Check out these easy Riddles for Children

Things you need for Tissue Paper/Kitchen Roll Rainbow
- 1.Tissue Papers
- 2. Sketch pens or temporary markers
- 3. Two glasses of water
How do you make a tissue paper rainbow?
Colour the ends of the tissue paper with the sketch pens. Draw rectangles of rainbow colours on each end and ask the little one to fill them up. Make sure to fill these colours in well so there is enough dye to travel up the paper. Once done, put the ends inside the glasses of water. Do not put the ends too deep in the water, the dye will dissolve in the water rather than travelling up. The washable marker dye with slowly make it’s way up with the water to meet the other side in the center of the paper towel. Leave the paper towel for 10-15 minutes and you shall eventually see the colors come together and connect at the center.

Learnings from this paper tissue rainbow with markers
Tissue soaks up the water and the dye spreads over the dry parts of the tissue paper. Capillary action makes the dye move upwards and thus spread. Sometimes the entire rainbow is unseen, but they generally are a full arc. The colour of the water was transparent in the beginning of the activity. This changed to black in the end. All the colours together combine to form the color black.
Rainbow CD experiment (Science experiment with CDs)
Very easy and minimal things required to set this up. But definitely a lot of fun and so much to talk about
- Why does this happen
- When does an entire rainbow form?
- Colours of the Rainbow.

Things you need to set up for Rainbow on a CD activity
- 1. An old CD
- 2. A candle. Preferably a birthday candle(those little ones).
- 3. Wooden blocks or utensils to support the CD.
How do you get the rainbow effect on a CD?
Place the CD on a stand, a little above the ground and place the candle in the middle of the CD. The candlelight reflects on the CD surface creating rainbow colours. We didn’t have a smaller candle. But if possible, keep the height of the candle equivalent to that of the height of blocks or support that you’ve created to put the CD on. The visibility chances are more when the room is darker and the candle is closer to the CD’s surface.

Learnings from Cd rainbow diffraction – Why do CDs reflect rainbow colors?
The colors that we see on the CD are created by white light reflecting from ridges in the metal. When light reflects off or passes through something with many small ridges or scratches, we get rainbow colors and interesting patterns. These are called interference patterns.
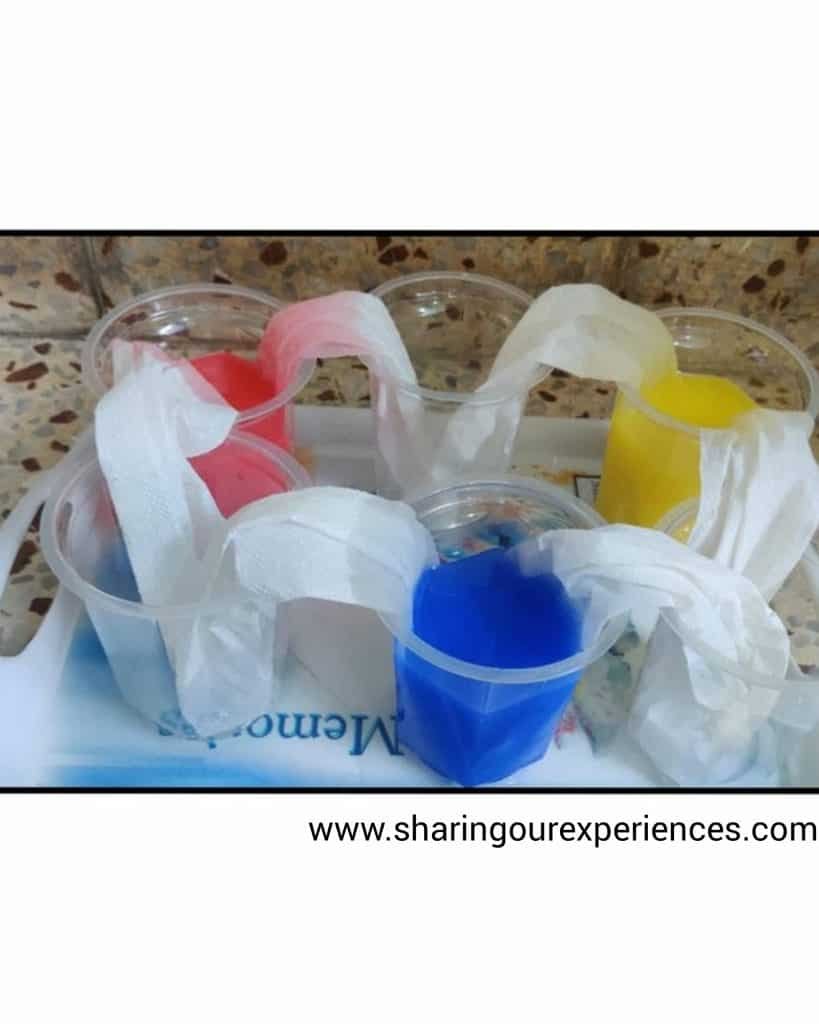
Walking Rainbow Experiment (Science experiments with tissue paper and colored water)
Kids will love making their very own walking rainbow experiment from just three colors. It’s amazing how color mixing science experiment for kids can make something spectacular!
Things you need for this fun STEM activity with tissue papers
- 6 jars or glasses. We used plastic glasses.
- 3 primary colours : Red, Blue & Yellow. You could use paint colours or food colours, anything that you have.
- 6 kitchen paper towels or tissue papers of equal size.
- Water to fill in 3 glasses.
How do you do the walking rainbow experiment?
Pour water into 3 glasses. Mix each primary color in one of the glasses. Arrange the glasses in a circle, alternating one filled and one empty glass. Make paper towel bridges between two glasses. Make sure the towels are equally placed between two glasses. Repeat for all glasses. Let it sit for 48 hours. Observe the Magic!


Learnings – Science behind walking water experiment
There are three primary colours : Red, Blue & Yellow. The primary colours come together to form the secondary colours :
- Red + Yellow = Orange
- Blue + Yellow = Green
- Red + Blue = Purple
Water moves upwards through the tissue papers, defying gravity, and fills the other glass next to it. The capillary action in the water is the same principle through which plants pull water through the soil and upto their leaves to keep them hydrated.
Sticky Ice Experiment (Science experiment with ice and salt)
Quick, easy and a little magical – this kid’s science experiment with ice is simply too cool not to do.
The classic activity challenges little magicians scientists to lift an ice cube using only a string and salt. With serious wow factor, this science experiment is a simple, fun way to learn about salts’ effects on the freezing point of water.
How to make ice science experiment
I think his face in the video says it all! He was so intrigued we repeated the magical experiment 4 more times. While we waited during the other experiments I explained to R what was happening we talked about other ways people use salt to melt ice {ice on roads, making ice cream}, and whether the size of the salt would have an effect on the ice.
Learnings from this science activity with ice cubes and salt – Science behind lifting ice cube experiment
The salt sprinkled on the ice causes it to start melting, salt actually lowers the freezing point of ice. In order for the ice to melt, however, it has to absorb heat. The heat that it absorbs comes from what’s around it, the water near the ice cube. Some of this water becomes so cold it refreezes and the string becomes trapped. Thus when you lift the string the ice gets attached to it.
Rising water experiment (Science experiment with candle and water)
It’s like magic and kids love watching this fascinating science experiment, but do you know what exactly happens when you place a glass over a lit candle in a bowl of water?
Things you Need for this easy science activity with candles in a jar
- A candle
- Shallow Bowl to pour water
- Water ( Adding a few drops of coloring makes it easier to see).
- Matchsticks to light the candle
- Tall transparent glass or jar to cover the candle
Rising water experiment step by step (Also called Burning candle experiment)
Set your candle on the plate and pour approximately 1/2 to 1 cup of water on the plate. Light your candle, then place your jar (or vase) upside-down over the candle. As the candle goes out, all of the water is sucked up into the jar. The water rises!
Explanation and Learning – How and Why does the water rise?
The burning candle uses up all the oxygen because of which the water rises as soon as the candle went out. A vacuum is created inside the jar due to the the lack of oxygen, a low pressure is formed and thus water rises to equalize the pressure. This explanation is for older kids. The younger ones can just sit back and enjoy the magic of science.
Disappearing Germs Science Experiment (science experiments with ziploc bags)
This one particular experiment is so appropriate for todays time and circumstance.
It teaches kids the importance of washing hands, keeping hands clean before eating food, or praying is absolutely necessary.
So we did this monster germs blow painting on tracing of hands. Then after putting this paper inside a ziplock bag, we traced the same handprint on the outside of the bag with a marker pen. the magic starts when you dip this bag in a bowl or tub of water. The monsters drawn on the paper begin to disappear. All you see is the hand clean and bright.

Why germs disappear in this germs science experiment for kids – (Also covers Why handwashing is important)
This happens because of light refraction. When light passes from one medium to another, there’s is a change in its direction. To the little ones, it looks nothing less than magic. This activity also emphasizes on the importance of washing hands.

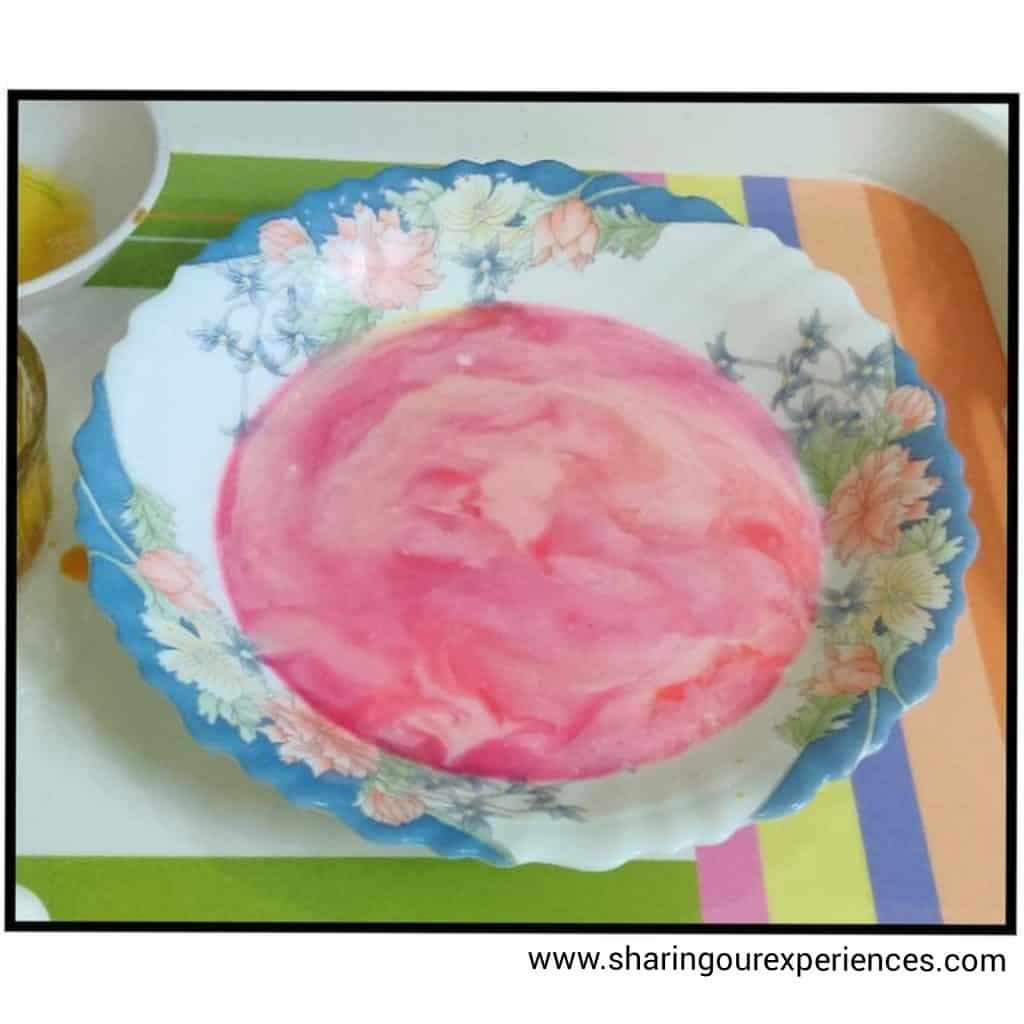
The Colour Changing Milk (science experiment with milk and food coloring)
This dancing colour experiment is nothing less than magic to the kids.

Things you Need for dancing milk science experiment
- Milk
- Food Coloring. The more colors the better
- Dish Soap
- Shallow Dish or Bowl
- Medicine Dropper
- Cotton Swab
Process for magic milk experiment
- Pour some milk into a shallow dish or bowl until the milk covers the bottom.
- Add some drops of food coloring to the milk with the help of a medicine dropper. You can use 3-4 different types of food coloring or normal paint colors also.
- Add a drop of dish soap into the center of the milk. With the help of a cotton swab.
- Watch in amazement as the colors dance across the surface of the milk.

Colour changing milk experiment explanation – What is the science behind magic milk?
When liquid dish soap is added to milk with drops of food coloring on the surface, the soap reduces the surface tension of the milk and reacts with the fat. This interaction causes the fat particles in the milk to move and create swirls of color.
Shaving Foam Rain Clouds
The Shaving Foam Rain Clouds experiment is a fun and relatively easy activity to do with kids. This can be turned into a learning session about weather, clouds, rain and storms.
Or simply let the kids enjoy the different colours, mixing of colours, experience the different textures and colours this could make. Either way, it’s fun to do and beautiful to watch.

Things you need for Shaving foam/cream rain clouds experiment
- Shaving Foam
- Water
- Food colours
- Medicine Dropper or Straw.
- Transparent Long Jar or Glass
How to make Shaving cream rain clouds in a Jar (How do you make rain cloud experiment)
Fill the transparent glass with 3/4 water. Add a layer of Shaving Foam on top of the water to create a fluffy cloud. Let the shaving foam settle for a few minutes before you begin. The thick the layer, the longer the process will be. In small bowls, mix food colours and water. Using droppers, add the coloured water to the fluffy cloud. After a couple of minutes, you’ll see coloured water aka rain coming out of the cloud into the water.
What is the science behind rain cloud in a jar? Why does food coloring go through shaving cream – (How do you explain rain clouds to a preschooler)
Clouds are formed when rain droplets combine together. When the cloud is too heavy and full, the rain droplets fall out of the cloud. The shaving foam acts as the cloud. The colored water acts as the rain. The clean water acts as the air. When the coloured water “rain” gets too heavy, it falls out of the foam “cloud” and into the water “air”.
Experiments and Science Activities with Baking Soda and Vinegar
Volcanic Eruption experiment
This basic ingredients experiment is an instant hit with the kids. Also when you add a red colour to it, it’s almost like exlplaining how does Lava erupt from a volcano.
Things you need to make a volcano for kids
- Water
- Vinegar
- Food colour
- Baking soda
How do you make a baking soda and vinegar volcano?
Combine the first three ingredients in a glass or a bottle. Pour the soda into the glass/bottle and step away. There it is! It’s almost as magic for the little ones. But there’s science behind it.
Volcanic eruption experiment explanation – What is the science behind the volcano experiment?
This is an acid-base chemical reaction. Vinegar and baking soda combine to produce Carbon Dioxide. Carbon dioxide is the same type of gas used to make the carbonation in sodas. What happens if you shake up a soda? The gas gets very excited and tries to spread out. There is not enough room in the bottle for the gas to spread out so it leaves through the opening very quickly, causing an eruption.
The Self Inflating Balloon Experiment
Another lovely STEM Experiment with the simple baking soda and vinegar combination again.
Things you need to do the self inflating balloon experiment
- Empty Bottle
- Balloon
- Baking Soda
- Vinegar
How do you make a self inflating balloon?
Fill 1/3rd of the bottle with vinegar. Pour some baking soda into the balloon before you put it on the rim of the bottle. Now seal the rim of the bottle with the balloon completely. Be careful not to straighten the balloon immediately. Ask your kid to straighten or hold the balloon upright, ensuring that the baking soda falls into the bottle. Isn’t that a wow!!
So after a failed attempt, cause of the balloon containing a hole, we were successful at this.
Self inflating balloon explanation – How does self inflating balloons work?
When an acid and base mix they form a gas called carbon dioxide. Vinegar is the acid and baking soda is the base. It’s the carbon dioxide that inflates the balloon.
The DIY Lava Lamp for kids (science experiment with baking soda)
This lava lamp experiment is super cool! Kids will love exploring colored water and oil, but a surprise ingredient will make this more interesting for the kids.
Things you need to set DIY Lava lamp for kids
- Vegetable Oil
- Vinegar
- Food coloring
- Long transparent bottle or glass
- Small cup
- Spoon
- Baking soda
How to make a DIY Lava lamp with Baking soda
Start by getting an empty bottle or a tall glass. Then add three spoons of baking. Fill two-thirds of your tall container with oil. The baking soda will stay on the bottom of the container, do not try to mix it. We used regularly cooking fried oil which was anyways gonna be discarded. In the small container, add some vinegar and three drops of food coloring. Now that everything is ready, you can add drops of colored vinegar to your big container and start watching your homemade lava lamp.
Do not empty the vinegar at once, instead do it progressively to make this fun science experiment last. For a glowing effect, you can turn off the light and use a torch to light up your container.
DIY Lava lamp explanation – How does a homemade lava lamp work?
Oil and vinegar do not have the same density. Vinegar is denser than the vegetable oil we are using in this science experiment. That’s why it sinks to the bottom of the container. Once the vinegar touches the bottom of the container, it reacts with the baking soda. This chemical reaction creates bubbling carbon dioxide – these are the bubbles you see within the container. The bubbles attach themselves to the blobs of colored water and bring them to the top of the glass. When the bubbles pop, the blobs of colored water fall back to the bottom of the glass. This lava science experiment is sure to WOW😮👀 your kids. They may even ask you to do it over and over again like mine did.
Flying Teabag Ghosts Science Experiment (Spooky science activity for kids)

A fun educational Halloween themed experiment that we tried out. we were unsure about the results but it turned out quite interesting and fantastic to see.
Things you need to set up Flying tea bag ghosts experiment
- Teabags
- Marker pen
- Candle and matchsticks
How to make Flying tea bag ghosts (Ghost rockets for kids)
Basically, we emptied out the contents of a teabag, opened it up in a cylinder form, and drew a spooky ghost face on it. Then, we carefully lit it on fire in a place without wind or an air conditioner vent or fan on, and watch it burn to ash and fly!
Flying Teabag Ghosts Science Experiment Explanation – What is the science behind flying tea bags
When we light the cylinder form of the teabag on fire from the top, it begins to burn. Inside of the teabag is filled with air. So now this air begins to heat up. The air inside of the teabag is now hotter than the air outside of the teabag, thus as the teabag continues to burn down, it actually rises (also due to its lightweight) and burns to ash! Hot air balloons work on a similar approach.
If you would like to do more science experiments check out some of teh cience kits below. They are good
Best Science Kits for Preschoolers (Available on Amazon)
Einstein Box Science Kit for kids
Check out this awesome science activity kit for kids here

Genius Box Explosive Science Kit
Check out the latest price for this kit here, It is one of the best sellers so if it is above Rs 800 you can definitely get it.

Smartivity Mechanical Xylofun Music Machine
Also check out this DIY STEM kit for kids. It is for older kids

Liked this article on Fun Science experiments for kids?
If you liked this article , do share with with other parents and on social media, do leave a comment we would love to hear from you ..